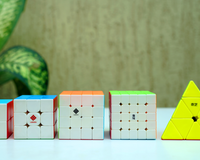
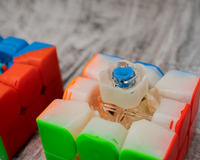
All about Gear Cube !!
The Gear Cube is a very cool-looking puzzle that can appear really complicated with all its interlocking gears and moving parts. However, this puzzle is actually remarkably easy to solve and relies only on a small set of moves to bring it to the solved state, so don’t let its appearance fool you!
The biggest difference between the standard Rubik’s Cube and a Gear Cube is that the Gear Cube is mechanically restricted, and its faces can only be turned in 180-degree turns. Every turn causes the surrounding gears as well as the middle gears to move, meaning that the puzzle actually has far fewer states than the 3x3.
The easiest way to solve this puzzle is to break it down into 5 steps:
1) Solve the corners.
2) Solve the centers.
3) Permute the edge gears.
4) Solve the inner edges (if your cube has them).
5) Align the final gears.

A Brief History of the Gear Cube
The original puzzle was designed by the world-famous puzzle maker Oskar van Deventer, originally called the Caution Cube. Later, it was mass-produced by Meffert, and quickly became popular due to its unusual mechanical design. Its distinctive mechanical motion makes it look much harder than a Rubik’s Cube, but it’s actually a lot easier to solve than that.
Step 0: Getting Familiar with the Notation
Before attempting to solve the puzzle, we should establish the notation used to get there. Now, following standard 3x3 notation for the 6 faces, we have the added constraint that the mechanism of the Gear Cube only permits 180-degree face turns. Thus, throughout this guide, we follow:
R2 → Turn the Right face 180 degrees
L2 → Turn the Left face 180 degrees
U2 → Turn the Up face 180 degrees
D2 → Turn the Down face 180 degrees
F2 → Turn the Front face 180 degrees
B02 → Turn the Back face 180 degrees
Step 1: Solving the Corners
Unlike a normal Rubik’s Cube, we do not get into making a cross and solving the edges of the first layer. In fact, we don’t even approach it in layers.
The first step is to solve the corners of the puzzle, which is fairly intuitive.
>>First, you want to find 2 corners that belong next to each other and try to match their colours correctly.
>>Once you have 1 matching pair, the other pair of matching corners can be found elsewhere on the cube, and all you have to do is bring these two pairs together to form one complete face of correctly placed corners.
>>You can use moves such as R2, D2, F2, etc. to move the corners into position.
>>There’s no particular algorithm to memorize on this step, so just focus on making those 180-degree turns to see how you can influence the corners to line up.
>>The goal of this step is to have all the corners on the puzzle correctly positioned around the cube, and to not worry about the orientation of the edges at this stage.
Step 2: Solve the Centers
>>Once you’ve solved the corners, the center pieces are next, which is another largely intuitive step but with a slight addition.
>>You can use the same 180-degree face turns as the previous step, but you may also need repeated turns of the same face, like R4, F4, D4, etc.
>>This may sound strange, but while 4 half-turns will bring the face itself back to the original orientation, the internal gears and center pieces will have moved over those turns!
>>One cool property of this puzzle is that after you solve the corners, at least two of the six centers will already be in their right positions.
>>So, you can manipulate the positions of the rest of them without completely destroying your solved corners.
>>By the end of this step, you should have solved corners and correctly-positioned centers, with the edge gears still in a scrambled state.
Step 3: Permute the Edge Gears
>>Next, we move to the edge gears, which contain the large visible gears. This is the part that stumps most people on the Gear Cube. However, there is a simple algorithm that can effectively be repeated to swap the necessary edge pieces!
>>First, find 2 edge gears that need to exchange positions and hold them in the upper-front and upper-back positions.
>>Then, do R2 U2 R2 U2 to swap the relevant pair of opposite edge gears, and continue to work through the remaining pieces.
>>Inspect the cube after each repetition of the algorithm, and keep orienting the edges in the desired way so the next pair occupies those positions, and then repeat the algorithm.
>>Again, the goal is simply to position the edge gears correctly, and to have the coloured edge pieces sit in between the correct centers.
>>The cube may look slightly distorted because the gear orientations haven’t been fixed yet, but we will get to that at the end.
Step 4: Solve the Inner Edges (IF Your Cube Has Them)
>>This intermediate step depends on the particular Gear Cube model you own.
>>Some variations have additional inner edge pieces, while simpler versions do not, so if your cube doesn’t have these pieces, you can simply skip to Step 5.
>>If your cube does have these pieces, hold the puzzle so that 2 matching inner-edge pieces are positioned on the top face and do R2 U2 R2 U2 R2 U2.
>>This sequence rotates the relevant inner-edge pieces into their correct orientations, and you may need to re-orient the cube and repeat this process depending on the exact configuration.
Step 5: Align the Gears
>>This is the last and most satisfying step, where all the corners, centers, and edge positions are already solved.
>>The only thing remaining is the orientation of the gears, making the puzzle look ever so slightly twisted away from a perfect cubic shape.
>>To fix this, choose a face and turn it 180 degrees (for example, R2), and keep performing this until the gears are aligned.
>>Because of the way the puzzle’s mechanism works, repeated turns will eventually bring the gears back into alignment, and you can move the other faces as necessary to repeat this process.
>>Turn the face slowly and watch how the gears move in this step, because eventually, every gear will line up and the cube will return to a perfect cubic shape!

SUMMARY OF STEPS
| STEP | What to do | Algorithm/ notes |
| 1 | Solve the Corners | Mostly intuitive; use R2, F2, D2 |
| 2 | Solve the Centers | Use R2, F2, D2; repeated turns like D4 may help |
| 3 | Permute the Edge Gears | (R2 U2) x 2 |
| 4 | Solve the Inner Edges |
(R2 U2) x 3, if your cube has them |
| 5 | Align the Gears | Repeat R2 as needed until gears line up |
Common Problems You May Face
A) Cube not Turning 90 degrees This is completely normal, since the Gear Cube is designed to have only 180-degree face turns, and trying to make a 90-degree turn can lock up the mechanism.
B) My puzzle looks solved but the gears are still twisted
C) You’re likely at the last step, with all the coloured pieces in their right positions, but this can easily be fixed by doing repeated R2 turns and watching the gear alignment eventually return the puzzle to its cubic shape.
D) I have extra small pieces that aren’t solved
E) You probably have a variant of the puzzle that has additional inner-edge pieces, so you need to revert to Step 4 of this guide and go from there!

Final Thoughts
The Gear Cube is a great example of a puzzle that looks complicated but isn’t necessarily hard to solve. The mechanism restricts the available moves and this makes for fewer permutations to deal with.
The easiest way to remember the solution is Corners → Centers → Edge Gears → Inner Edges → Final Alignment
Once you understand this, you’ll actually realize that there’s barely any algorithms involved, and it’s just a bunch of intuitive moves that eventually put the thing back together.
Just take it one step at a time and get your very own gear cube here now!