Introduction
While solving a Rubik’s cube can be a daunting task for beginners, understanding how to assemble it is pretty easy! In this blog, we'll provide a guide on how to assemble a 3x3 Rubik's Cube.Step 1 - Familiarize Yourself with the Cube
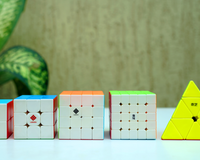
Before assembling the 3x3 Rubik's Cube, it's essential to understand its structure. The cube consists of six faces, each having nine smaller squares, each having their own color!
The structure of the cube consists of a core attached to 6 center pieces, 12 edge pieces and 8 corner pieces.
Step 2 - Make the White Cross

We start the assembling process by making a white cross.
Using the white color isn’t necessary, you can make a blue cross, the steps still remain the same, but for the sake of simplicity, we’re going to use the white cross. Slide in the 4 edge pieces next to the white center piece and make a plus sign with the edge pieces to complete the white cross.
Step 3 - Assemble the white face

Once we’re done with the white cross, we’re going to assemble the corners of the white face to complete the whole white layer. Make sure you keep the cross on the bottom to avoid the corners falling out. Simply slide in the white corners in the respective places.
Step 4 - Assemble the Edge Pieces of the Second Layer

Next, assemble the edge pieces of the second layer by picking the edges not having white or yellow stickers on them and then inserting them in their respective places. This locks in the white corners that we placed earlier.

Step 5 - Assembling the Last Layer
Finally, assemble the last layer of the cube by pushing in an edge piece into its respective spot. Bear in mind that it might be tough to push in the edge piece, so you might wanna loosen up the tensions on the yellow face. After you’re done pushing in the edge piece, push in the other pieces one by one, going either clockwise or anticlockwise. Make sure you don’t insert the corner piece at the last because it’s almost impossible to do so. Always insert the last corner before the last edge!


Step 6 - Test the Movement
Once the cube is fully assembled, test the movement of the layers. If you’ve messed with the springs and screws in the core, check if all sides are evenly tensioned, and if not, fix that!
Easy, wasn’t it?
Once your cube has been successfully assembled, you're now ready to embark on solving the 3x3 Rubik's Cube.
About Author

Sarthak Masta
Sarthak Masta is a speedcuber from Raipur. He started cubing in 2013 and now has 11 years of cubing experience. Apart from cubing, Sarthak enjoys making music and singing. He has attended a total of 7 competitions in Raipur and has gotten 10 podiums, with 2 gold medals, 4 silver medals and 4 bronze medals