Introduction
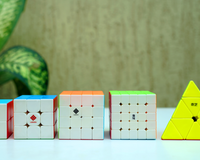
Assembling a 4x4 cube requires patience and quite a lot of time! In this blog, we'll provide a step-by-step guide on how to assemble a 4x4 Rubik's Cube.
Step 1 - Understand the Cube
Before assembling the 4x4 Rubik's Cube, it's essential to understand its structure. Unlike the traditional 3x3 cube, the 4x4 cube consists of 24 edge pieces and 8 corner pieces. Along with that, we also have 4 centers for each face, and internal pieces of different kinds (the big one and the small one).
Step 2 - Make a cross with the internal pieces
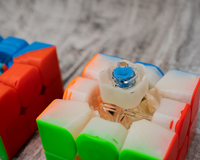
Take 2 small internal pieces and 1 big internal piece. Keep the big one in between the two small ones as shown in the picture. This set of internal pieces goes in between two centers. Slide in this set between any two centers and you’re done with one part of the cross. Repeat this with the adjacent sides to make a cross with the internal pieces. This is the toughest part of the assembly process so it’ll take a bit of time to get used to it, and it might get frustrating at times!
Step 3 - Put the White pieces in
Now that we’re done making a cross with the internal pieces, we have a structure to build the rest of the cube upon! For the sake of simplicity, we’re gonna be putting the white pieces first.
Hold the cube with the internal cross at the bottom and you can hang four centers in between the 4 sets of internal pieces! After hanging those centers, carefully put the cube down and slide all the white edges into their respective places. Make sure to follow the color scheme that the cube came with! Next, you can place the white corners in their respective places as well!
Step 4 - Assembling the Middle Layers

Now that we’re done with one layer, we’re gonna assemble the second layer! Put all the second layer pieces in their respective places. This step is pretty straightforward but it might be a bit clumsy because the pieces won’t exactly lock in because there are no internal pieces holding them yet.
After assembling the second layer, we’re gonna carefully make 4 more sets of internal pieces as we did before (2 small internal pieces and 1 big internal piece. Keep the big one in between the two small ones) and slide them one by one in the slots between the 4 centers in the middle layer. This step might also be a bit clumsy and you might mess up once or twice but keep going!
After we’re done with the internal pieces, you might feel the cube getting a bit stable and stiff. Good going eh! Now we can easily assemble the third layer by just placing the pieces on top of the second layer! The third layer might be a bit wobbly because it doesn’t have the support of the internal pieces missing in the upper face.
Step 5 - Assemble the Last Layer
The third layer of the cube has 4 slots for the small internal pieces in the total 8 center pieces of the layer. Slide in the small internal pieces by themselves in these 4 slots (don’t make the internal piece sets as we made earlier). After we’re done with that, we’re going to take a small internal piece and a big internal piece and then hold them together, and slide them carefully between the 3rd layer internal piece and the top layer center as shown in the image. Repeat this step for all the 4 sides in the top face and we have all the internal pieces of the cube assembled!
Now, you just have to push in the corners first and then the edges carefully one by one, and assemble the entire yellow face, except the centers, which can be pushed in at the last by placing the hook of the centers at one of the slots and pushing them in gently.
Step 6 - Test the Movement
Once the cube is fully assembled, test the movement of the layers. If you’ve messed with the springs and screws in the core, check if all sides are evenly tensioned, and if not, fix that!
Pretty challenging, wasn’t it? Assembling a 4x4 Rubik’s cube is a separate activity on its own and it’s pretty fun doing it once in a while.
Hopefully, you have a working 4x4 by the end of this blog and you're ready to embark on solving the 4x4 Rubik's Cube puzzle!

About Author

Sarthak Masta
Sarthak Masta is a speedcuber from Raipur. He started cubing in 2013 and now has 11 years of cubing experience. Apart from cubing, Sarthak enjoys making music and singing. He has attended a total of 7 competitions in Raipur and has gotten 10 podiums, with 2 gold medals, 4 silver medals and 4 bronze medals


