Introduction
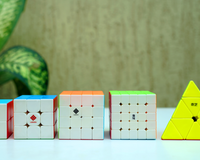
The 5x5 Rubik's Cube, with its larger size and increased complexity, is a scary task when you look at the huge amount of pieces. So, if you think you “broke” your 5x5, or just wanna take it apart and assemble it to set it up, here’s a step-by-step guide on how to assemble a 5x5 Rubik's Cube.
Step 1 - Understand the Cube
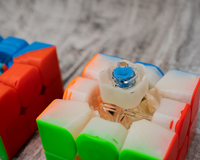
Before attempting to assemble the 5x5 Rubik's Cube, it's crucial to understand its structure. The cube consists of 36 edge pieces and 8 corner pieces. Additionally, there are 9 center pieces on each face of the cube. There are 2 types of edge pieces, the middle edge piece and the corner edge piece. There are also 3 types of centers, the edge center, the corner center and the stationary center which does not move during the solve. Here’s a sample image of all these pieces so you can get a clear understanding!

Step 2 - Make the foundation
Begin the assembly process by getting a foundation ready! Make a cross on any face, let’s assume white. For the white cross we have 4 edges, the white-blue edge, the white-red edge, the white-green edge and the white-orange edge. So to make the white cross, we have to make a set of 2 center pieces and an edge piece in between! So, if we assemble the blue side of the cross first, we need a blue edge center, a white edge center, and we need to stick a white-blue middle edge piece in between to make a set, as shown in the picture.

Slide this set in between the white and blue stationary center pieces and repeat this step on all 4 sides to complete the foundation, which is the white cross!

Step 3 - Complete the White Side
Once you have a white cross, start assembling the remaining white pieces one by one, starting with all the corner centers having the white sticker on them! Then move on to the white edges and the white corners and you should have something that looks like this.

Step 4 - Assemble the Middle Layers
Next, assemble the middle layers one by one. This step is pretty intuitive and easy, because there are no small internal pieces to deal with. Here’s a set of images of how the cube would look like after assembling each layer so you can better understand what’s going on!


Step 5 - Assemble the Final Layer
The final layer here is the yellow layer, so we start by first making a yellow cross by taking a yellow edge center and a yellow middle edge, making a set and sliding it in its respective spot. Repeat this with all 4 sides to make a yellow cross on top, then we proceed by sticking in the yellow corner pieces, because it’s almost impossible to put them in after the edges!
After the corners, simply assemble the rest of the yellow edges in their respective spots and you should have a cube that looks like this!


After assembling the edges, move on to the centers, more specifically, the 4 corner centers. Just align the hook of the center piece with the slot and push it in gently. Repeat with all centers!
Step 6 - Test the Movement
Once the cube is fully assembled, test the movement of the layers. If you’ve messed with the springs and screws in the core, check if all sides are evenly tensioned, and if not, fix that!
Hopefully you have a fully assembled 5x5 now!
Now that your cube is assembled, it's time to tackle the challenge of solving the 5x5 Rubik's Cube.
About Author

Sarthak Masta
Sarthak Masta is a speedcuber from Raipur. He started cubing in 2013 and now has 11 years of cubing experience. Apart from cubing, Sarthak enjoys making music and singing. He has attended a total of 7 competitions in Raipur and has gotten 10 podiums, with 2 gold medals, 4 silver medals and 4 bronze medals


