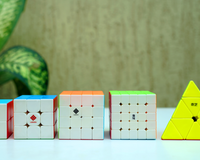
4x4 Rubik’s Cube Beginner Guide
Going from a 3x3 to a 4x4 Rubik’s Cube can feel like a huge step.
With all the extra pieces, along with two nightmares called “no fixed centres”, and something called “parity”, the 4x4 (also known as Rubik’s Revenge) looks way more complicated.
But here’s the good news:
If you know how to solve a 3x3 and have just a little bit of leftover patience, you can learn how to solve the 4x4 cube.
This guide explains the reduction method, step by step, in a way that’s easy to follow along with, especially if you already know how to solve a 3x3 (knowing 3x3 is kinda important!).
Introduction to the 4x4 Rubik’s Cube
Unlike the 3x3 cube, the 4x4 does not have fixed centre pieces. So:
- Centres can freely move around and go wherever they want
- Knowing the color scheme matters
- Way more room to mess up
These differences are what make the 4x4 look confusing, but what’s the point of learning something that isn’t challenging in the first place? Isn’t a challenge exactly WHAT MAKES IT INTERESTING?
Struggling to Solve a 4x4?
Many beginners (including me) first encounter the 4x4 after getting good times on the 3x3 and feel stuck at one core concept:
“I should solve the 4x4 layer by layer, because that’s how you solve a 3x3”
It is very normal to think this, I myself completed 3 whole layers of the 4x4 (after a few hours) but then obviously got stuck on the final layer.
That is not how you solve it! Let’s look at it in a different way, shall we?
The Reduction Method
This is the different way! The Reduction Method is the most commonly used way to solve a 4x4 Rubik’s Cube for beginners.
The idea is very simple (and it has nothing to do with layer by layer):
“I should first turn this 4x4 into a 3x3 and then solve it like a 3x3”
If you know nothing about the reduction method, this statement might look like I am being sarcastic, or I am trying to crack a bad joke, but no, I am serious, this is how it works. Let’s see how!
You solve the centers, you pair up the edges, and you make the cube look like this:

See what I mean?
Step 1: Solving the Centres
Start with any colour. Let’s say white.
Your job is to form a 2×2 block of the white at the centre.
How to do it?
- Create two 2×1 blocks
- Join them to form a 2×2 centre
- Move on to the opposite colour (yellow) and solve it opposite to white.
You can solve it intuitively, but one algorithm helps:

After solving white and yellow, solve the remaining four centres using similar insertion techniques.
Make sure you follow the standard 3x3 colour scheme:
White in front, Yellow at the back, with Green–Orange–Blue–Red in clockwise order.
This step is mostly intuitive and improves with practice.
Step 2: Pairing Up the Edges
This is kinda tricky.
What you have to do here is pair identical edge pieces so they look like single edges on a 3x3 cube.
Basic idea:
- Find two identical edge pieces
- Bring them to the middle slice (one on top, one on bottom)
- Pair them using slice moves like Uw / Uw’
Something like this:

Once paired:
- Store completed edge pairs in the top (U) or bottom (D) layer
- Be careful to not disturb them while pairing others
- Be careful to not disturb the beautiful centers you just made!
After filling the top and the bottom layer, you will be left with four unsolved edges, all in the middle slice.
These can be solved using the flipping algorithm:
Algorithm:
R U R' F R' F' R
Here’s how to use this algorithm:
- First do the slice as shown in the first image with the green and orange pair to get something that looks like the second image
- Then do the flipping algorithm.
- Then reverse the slice that you did, and your edge will be paired (green and orange edge in this case)

At the end of this step, your cube should look like a scrambled 3x3.
Step 3: Solve It Like a 3x3
With centres solved and edges paired, the 4x4 behaves just like a 3x3 cube.
Use your regular 3x3 method (maybe CFOP or beginner’s method) to continue.
If you don’t know or don’t remember how to solve a 3x3, you can refer to beginner-friendly 3x3 tutorials available on Cubelelo.
Step 4: Parity Errors
Parity errors are situations that cannot happen on a 3x3, but occur on a 4x4.
The two most common parity cases are:
OLL Flip Parity

One edge appears flipped incorrectly.
Algorithm (example):
Rw, U2, X, Rw, U2, Rw, U2, Rw', U2, Lw, U2, Rw', U2, Rw, U2, Rw', U2, Rw'
PLL Swap Parity

Two edges need to be swapped. With Yellow on top:
Algorithm:
r2, U2, r2, Uw2, r2, u2
Note that “Rw” means both layers and the small “r” means just the inner slice!
The OLL parity algorithm might need some practice to learn, but once you learn it, it’s really hard to forget! I myself still remember this algorithm and I learnt it about 13 years ago!
Step 5: Practice
Like any cube:
- Speed comes with repetition
- Recognition improves with more and more solves
- Confidence and muscle memory build slowly
Watching example solves from different cubers online on YouTube can help you understand how individual cases appear in real solves.